Abstract
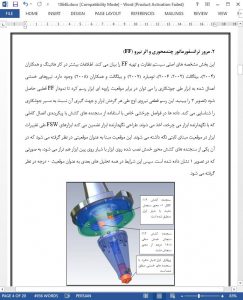
FSW process automation is essential to making consistent and reliable friction stir welds and this requires an understanding of how tool design can influence process parameters, which in turn can provide high joint strength and performance. Tool optimisation hinges on a better understanding of the effect of tool parameters on forces during welding, on the tool torque and tool temperature. Important parameters include flute design (e.g. number, depth, and taper angle), the tool pin diameter and taper, and the pitch of any thread form on the pin. These influences were investigated in this study using a systematic tool profile matrix which considered the influence of four variations of each of these six geometric factors. Forces on the tool, applied torque and temperature were monitored and recorded during welding of 6 mm thick 5083-H321 aluminium alloy. The lateral reaction forces on each tool and the relative angle of orientation of the peak resultant force are described via a bi-lobed polar plot called the “force footprint” (FF). This provides visual information on the interaction between tool profile and the plastic stir zone, which cannot be obtained purely from force magnitude information. Key characteristics of the tool–weld interaction can be extracted, analysed and summarized to provide guidance on optimum tool selection for a given set of weld conditions.
1. Introduction
Friction stir welding (FSW) was developed at TWI in 1991 and is successfully being applied to an increasing number of joining applications worldwide. FSW uses a non-consumable tool to generate frictional heat at the point of welding, inducing complex plastic deformation of the workpiece along the joint line. Generally the plates to be joined are placed on a rigid backing plate and clamped to prevent the faying joint faces from separating. A shouldered cylindrical tool, with a spe-cially shaped pin (probe), is then rotated and slowly plunged between the faying surfaces. This causes frictional heating of the plates, which in turn lowers their mechanical strength. After a certain dwell time weld traverse starts whilst a relatively high axial load (z-force) is maintained (by a forwards rake angle) on the tool shoulder behind the pin to support weld forging. After welding the tool extracts from the plate to leave a characteristic keyhole.
10. Conclusions
This paper is one of the first studies that has systematically examined and reported influences of tool geometry factors on friction stir welding process parameters and on weld tensile strength. Several points can be drawn out from the discussion of the results above to provide some general guidelines on tool design. The data in this study have been obtained for a specific alloy AA5083-H321 and plate thickness (6mm), but it is known that certain of the tool parameters have been identified as important in welding other alloys and plate sizes, e.g. the 3-flute concept is proven in thread taps and widely used in the tri-flute tools developed at TWI. Thus these guidelines may be applicable to a range of alloys and plate thicknesses. The guidelines are unlikely to be definitive as other tool parameters not considered in this study may be influential on forces, torque, plastic stirring and hence tensile strength. It is also worth noting that the extensive internal voiding observed with certain tools implies that the forging role of the tool shoulder may be rather limited and that a rotating shoulder may be an inefficient part of the welding process.
